
Revamping your countertops with handmade Mexican tiles can add a vibrant and unique aesthetic to your kitchen or bathroom. However, proper preparation is key to ensuring the final result looks and functions beautifully. In this guide, we’ll walk you through the process of removing old countertops, installing plywood and backer boards, and preparing the surface for tile installation.
For a detailed walkthrough, watch our video below:
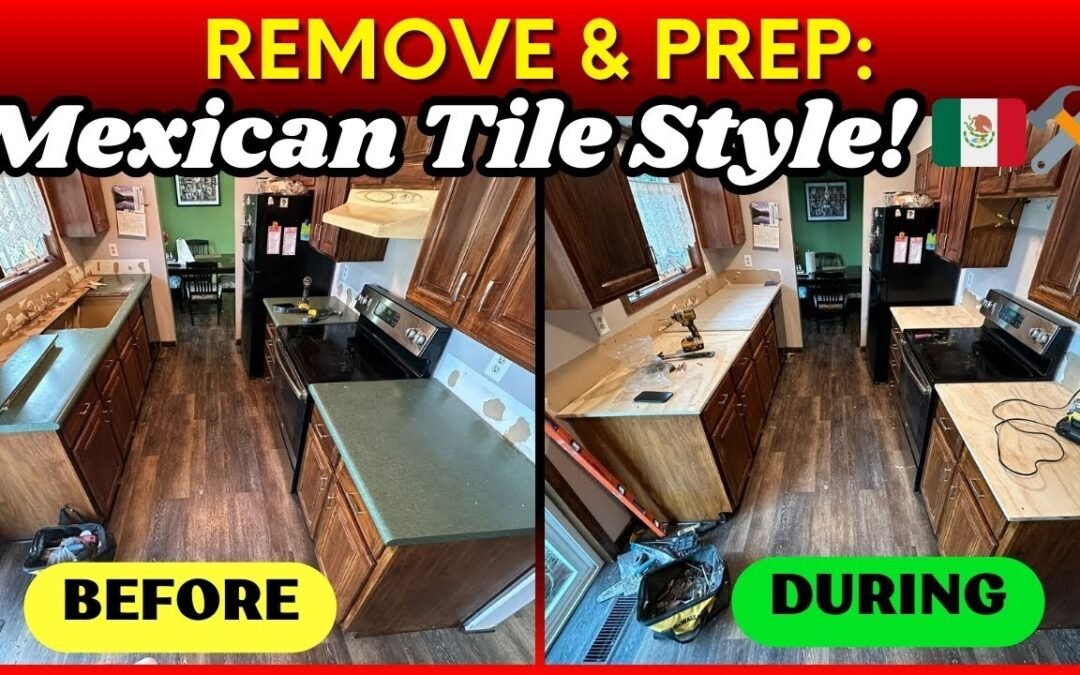
🛠️ How to Remove Old Countertops and Prepare for Installing Mexican Tiles 🇲🇽 - YouTube
Materials Needed
- Crowbar or pry bar
- Screwdriver or drill
- Utility knife
- Plywood (two layers for added stability)
- Cement backer boards
- Saw (for cutting plywood and backer boards)
- Measuring tape
- Screws
- Safety goggles and gloves
Step-by-Step Process
1. Remove the Old Countertops
- Start by detaching the old countertops. Use a screwdriver or drill to remove screws and hardware securing the countertops to the cabinets.
- Carefully pry the countertops loose using a crowbar or pry bar. Take your time to avoid damaging the cabinets.
2. Clean and Inspect the Area
- Once the old countertops are removed, clean the surface of the cabinets to remove debris.
- Inspect the cabinets for any damage and make necessary repairs to ensure a stable base for the new countertops.
3. Install the Plywood Base
- Measure the countertop area and cut two layers of plywood to fit. The double layer provides added support for the weight of the Mexican tiles.
- Secure the plywood layers to the cabinets with screws, ensuring they are flush and level.
4. Add the Backer Boards
- Measure and cut cement backer boards to fit on top of the plywood. These boards create a stable, moisture-resistant surface for the tiles.
- Attach the backer boards to the plywood using screws, leaving a small gap (approximately 1/8 inch) between each board to allow for expansion.
- Tape and seal the seams between the boards with cement board joint tape and thin-set mortar.
5. Prepare the Sink Cutout
- Mark the outline of the sink on the backer board using the sink template or by tracing the sink's edges.
- Cut out the sink opening with a saw, ensuring it fits snugly.
Pro Tips
- Take accurate measurements: This ensures the plywood, backer boards, and sink cutout fit perfectly.
- Work carefully during removal: Avoid damaging cabinets or plumbing when removing the old countertops.
- Use quality materials: Plywood and backer boards provide a strong foundation for the heavy and uneven surface of handmade tiles.
- Plan for uneven tiles: Handmade Mexican tiles may vary slightly in size and shape, so preparation is crucial for a smooth installation process.
Video Walkthrough
Watch the video below for a step-by-step demonstration:

What’s Next?
Now that the countertops are prepared, stay tuned for Part 2, where we’ll guide you through installing the vibrant and unique handmade Mexican tiles. Subscribe to our channel for updates:
🛠️ How to Install Mexican Tiles on Countertops 🇲🇽 - YouTube

Conclusion
Removing old countertops and preparing for tile installation is a critical step in achieving a durable and beautiful finish. By following these steps, you’ll create a stable foundation ready for the unique challenge of installing handmade Mexican tiles. For professional assistance, Frank's Handyman Service is here to help with all your remodeling projects.
Call us at (503) 522-2672 for a free estimate or visit our website to learn more.
