
Adding new cabinets is an excellent way to upgrade the functionality and aesthetics of your bathroom and kitchen. In this guide, we’ll walk you through the installation process, including connecting a bathroom vanity to the plumbing. Whether you’re a beginner or looking to refresh your skills, this tutorial will provide clear steps to achieve professional results.
Tools and Materials Needed
Tools:
- Drill and screwdriver
- Measuring tape
- Level
- Stud finder
- Circular saw (if adjustments are needed)
- Utility knife
- Caulk gun
Materials:
- Bathroom vanity and kitchen cabinets
- Screws and wall anchors
- Shims
- Plumbing connectors (for vanity)
- Silicone caulk or adhesive
Step 1: Clear the Workspace
- Remove Old Cabinets: If you’re replacing existing cabinets, carefully unscrew and detach them from the wall. Disconnect any plumbing connections for the vanity.
- Clean the Area: Ensure the wall and floor are free of debris, nails, or adhesive remnants to create a smooth surface for the new installation.
- Organize Materials: Place all tools and materials within reach to streamline the installation process.
Step 2: Plan and Measure
- Measure the Space: Use a measuring tape to confirm the dimensions of the area where the cabinets will be installed. Verify that the new cabinets fit properly.
- Mark Stud Locations: Use a stud finder to locate and mark wall studs. Cabinets should always be attached to studs for secure support.
- Outline Cabinet Placement: Mark the cabinet positions on the wall using a pencil. For vanities, ensure the plumbing lines up with the cabinet’s cutouts.
Step 3: Install the Bathroom Vanity
- Position the Vanity: Place the vanity in its designated spot. Use shims to level the cabinet if the floor is uneven.
- Secure to the Wall: Drill screws through the back of the vanity into the wall studs. Double-check that the vanity is level before fully tightening the screws.
- Connect Plumbing: Attach the sink to the vanity and reconnect the plumbing. Use a wrench to secure water lines and ensure there are no leaks.
- Seal the Edges: Apply a thin bead of silicone caulk around the edges where the vanity meets the wall for a clean, finished look.
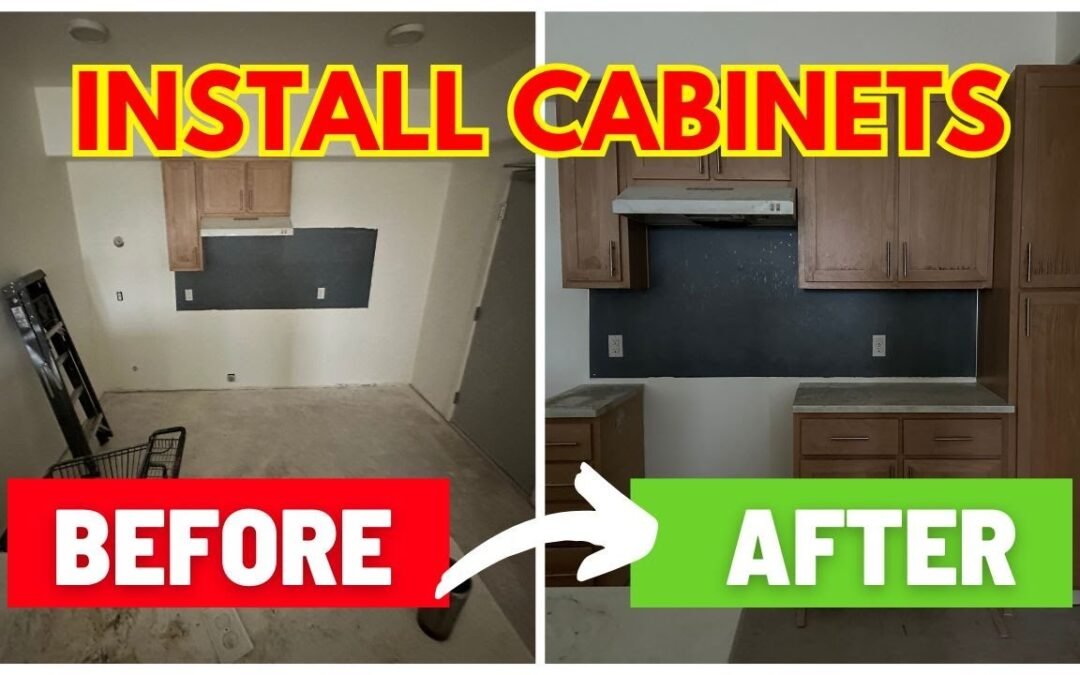
Step 4: Install the Kitchen Cabinets
- Start with Upper Cabinets: If installing both upper and lower cabinets, always begin with the upper ones to prevent damage to the lower cabinets.
- Attach Upper Cabinets:
- Use clamps to temporarily hold the cabinets in place.
- Drill screws through the cabinet backs into the studs.
- Ensure the cabinets are level and aligned before securing them fully.
- Install Lower Cabinets:
- Position the cabinets, using shims to level them as needed.
- Attach them to the wall studs and neighboring cabinets for added stability.
- Add Finishing Touches: Install hardware such as handles or knobs and fill any gaps with caulk or trim.
Video Walkthrough
To see the full process in action, including plumbing connections and cabinet alignment tips, check out our video:

Conclusion
Installing bathroom vanities and kitchen cabinets can seem daunting, but with proper planning and tools, you can achieve a polished, functional result. This step-by-step guide ensures you’re well-equipped to handle your project with confidence.
