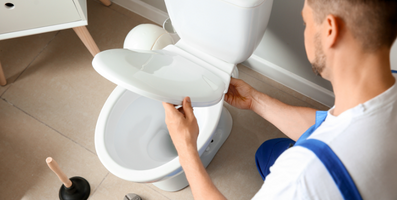
Is the toilet floor leaking water? Before spending any money, maybe, it just needed a little fix of wax ring replacement. A ring made of thick wax forms a watertight seal between the drain pipe and the bottom of the toilet.
Wax rings can last for decades but can also dry out, crumble or fail early. They are cheap and available at almost any hardware store for less than $10. Replacing the ring can be done in seven simple steps.
The symptoms of toilet wax ring leakage can include wobble toilet and toilet seal leaking making the floor wet. It is not hard to replace the toilet wax ring. It can be done at home by draining the tank, detaching the supply line, removing the toilet, and replacing the new wax ring.
Materials and Tools Required
Adjustable wrench
Bucket
Wet/ Dry vacuum or sponge
Scraper or putty knife
Wax ring

7 Steps Guide for Replacing Toilet Wax Ring
Step 1: Drain the Toilet Tank
First, turn off the water supply line. The valve is usually at the bottom left of the toilet. Close the valve by rotating in a right-handed direction.
Now, remove the lid of the tank and flush the toilet. Hold the toilet handle down so as much as water can draw off from the bowl and the tank. Then use a sponge or water vacuum to drain any water left in the bowl.
Ensure the bowl and the tank are dry before grabbing the toilet to place it on a thick cover.
Step 2: Remove the Toilet
Detach the supply line of water by undoing the compression nut. Place a thick cloth or cover on the floor where the toilet will be positioned while replacing the wax seal.
Take off the caps of bolts and washers. Use the scraper to push upward gently to remove the caps. Now, with adjustable wrench size, apply enough pressure to untie the bolts. Be mild. Anything more may break or crack the toilet anchor flange.
With the help of a wrench, remove the remaining nuts and washers from bolts at the toilet base. If the nut spin along with the bolt, hold the bolt with separate pliers while untying the nuts or washers.
Safe these bolts, nuts, and washers as they’ll come in handy while installing the toilet.
Step 3: Shift the Toilet
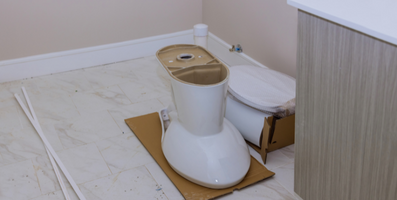
Hold the toilet under the sides of the bowl and move it gently back and forth to break the old wax seal. Attentively, lift the toilet and place it on the thick cover on the floor.
If the toilet is too heavy, try lifting the tank individually from the bowl by detaching the bolts and separating the toilet.
Also, check the bottom of the toilet to make sure the old wax ring isn’t attached to it.
Step 4: Take off Old Wax Ring
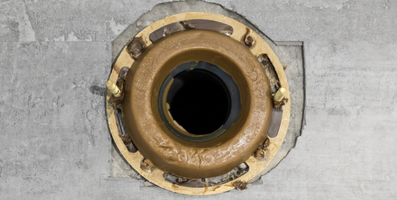
Scrape the existing wax seal from the base of the toilet flange by using a scraper or putty knife after cleaning the caulk around the toilet floor and examine the area for any crack for fixing. Continue with the installation of a new wax ring.
Make sure toilet flange bolts are still in good condition if you’re not changing to new ones.
Clean around the toilet anchor flange, scrap the drain with putty knife gently.
Step 5: Place the Wax Ring
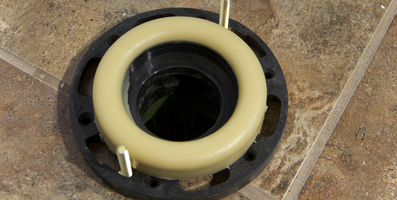
Attach the new wax ring seal on top of the toilet flange. Check the placement should be in the center. Take the bolts as a guide to put the ring on top.
Step 6: Put the Toilet Back
Position the toilet by using bolts of the toilet flange as a lead. Ensure the toilet is placed correctly with the floor level, don’t move back and forth once the toilet is placed on the wax seal.
While placing the seal is misbalance, the toilet will leak like before. So be careful with the position.
Step 7: Re-Bolt the Toilet on the Floor
Put the washers and bolts back on the toilet. Tightly close the bolts to place the toilet bowl with level on the floor firmly. Too tight bolts can also damage the bowl. Then top it off with the remaining caps.
Lastly, connect the supply line and turn on the water valve. Allow the tank to fill, and now, flush it several times to check the complete installation has performed correctly.
Important Toilet Repair Tips to Keep in Mind
Wax Ring
Use wax ring as the wax is known for resisting bacteria and fungus and retaining its sealing capacity after decades of use. Wax rings are pretty reliable, cheap, and fit in almost any toilet.
Wax ring can last longer than the toilet itself but can also tear out early. Reasons can be dry wax, poor quality manufacturing, or flop before its time.
Toilet Flange
If the toilet misbalance goes from side to side after changing the wax ring even a little bit, maybe the toilet flange is broken. However, the problem can be fixed with the flange repair kit.
Gap Floor
Ceramic tile may create a gap between the toilet flange and the toilet. In that condition, add a flange ring to fill the gap. The leakage is minimal or can be solved with cement seal glue.
Water Supply
Remember to drain the toilet tank and disconnect the water supply line before changing the flush valve.
Cause of Damage
Make sure to acknowledge the actual source of leakage before going to a store. Check anything you need beforehand to fix the problem.
Conclusion
Toilet leakage can cause so much struggle as the washroom is a basic day-to-day need. But the simple replacement of a wax ring can save all the fuss. Having a wobbly seat or toilet seal leakage is a common problem that can be solved at home with a simple understanding of what needs to be done.

