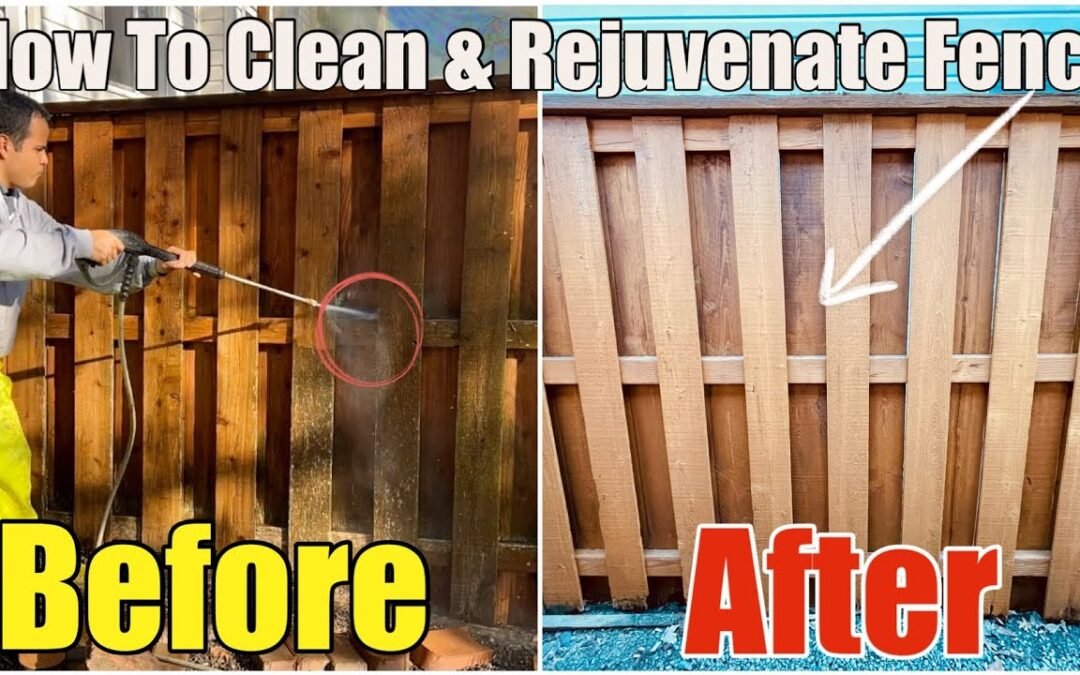
A well-maintained fence and deck add tremendous curb appeal and longevity to your outdoor spaces. If your fence and deck are looking worn or covered in grime, mildew, or mold, pressure washing can help rejuvenate the wood, preparing it for staining. In this guide, we’ll walk you through the process of cleaning and prepping your fence and deck so you can achieve professional-quality results.
Why Pressure Wash Your Fence and Deck?
Regularly pressure washing and staining your fence and deck:
- Removes Grime and Mold Buildup: Clears off years of accumulated dirt, mold, and other residues.
- Restores the Wood’s Natural Color: Pressure washing followed by staining revitalizes the wood.
- Extends the Wood’s Lifespan: Protecting the wood surface prolongs its lifespan by several years.
Tools & Materials Needed
- 3000 PSI Honda-Powered Pressure Washer
- Zepp Wood Deck and Fence Pressure Wash Solution
- 1-Gallon Hand Pressure Tank
- Paint Roller and Brush for stain application
- Behr Premium Waterproof Wood Finish in Natural Light Brown or Red (for decks)
Step-by-Step Guide to Pressure Washing and Staining
Step 1: Apply Cleaning Solution to the Fence and Deck
- Prepare the Cleaning Solution: Mix Zepp Wood Deck and Fence Pressure Wash Solution in a 1-gallon hand pump sprayer according to the label’s instructions. This solution helps to break down grime, making it easier to wash away.
- Apply the Solution to the Wood Surface: Spray a generous amount on all surfaces of the fence and deck, covering both sides and hard-to-reach areas. Allow the solution to sit for 5-10 minutes to loosen dirt, mold, and buildup.
Step 2: Pressure Wash the Wood
- Set Up the Pressure Washer: Attach a 50-foot hose to the pressure washer and choose an appropriate nozzle.
- Begin Washing: Hold the pressure washer 3-6 inches away from the wood surface and start washing in smooth, consistent strokes. Avoid focusing too long on one spot to prevent gouging the wood.
- Wash All Surfaces: Be thorough, getting into corners, railings, and other detailed areas. This will give the wood an even appearance when the stain is applied.
Step 3: Allow Wood to Dry
- Drying Period: Allow the fence and deck to dry for at least two days to ensure all moisture evaporates before staining. This helps the stain adhere properly and prevents moisture from getting trapped.
Step 4: Apply the Stain
- Choose Your Stain Color: We used Behr Premium Waterproof Wood Finish in a Natural Light Brown for the fence and a Red color for the deck.
- Apply Stain with a Roller and Brush: For even coverage, use a paint roller on flat surfaces and a brush for edges and details. This method also prevents overspray, which is especially helpful if neighboring areas could be affected.
- Stain Both Sides and Edges of the Wood: This step will protect all visible surfaces and keep your fence and deck looking fresh for years.
Video Walkthrough For a detailed visual guide, check out the video below, where we show each step in detail:
Conclusion
Following these steps will restore the beauty of your wood fence and deck, adding years to their life. This investment in time and effort will keep your outdoor spaces looking professionally maintained and protect them from the elements. Consider pressure washing and staining every 5-10 years to keep your wood in optimal condition.

